Have you ever been enchanted by the warm aroma of an apple crumble wafting through your home? It’s hard to resist the comforting blend of tender baked apples, buttery crumb topping, and perhaps a scoop of vanilla ice cream melting ever so slightly on top. This delightful dessert often brings back fond memories of family gatherings and cozy evenings. Today, let’s dive into the delicious world of apple crumble, exploring how to create this beloved dish and share some tips to make your version a true standout.
Print
Apple Crumble
- Total Time: 65 minutes
- Yield: 8 servings 1x
Description
A warm and comforting apple crumble made with tender baked apples and a buttery crumb topping, perfect for any occasion.
Ingredients
- 6 cups of peeled and sliced apples (Granny Smith or Honeycrisp)
- 1 tablespoon of lemon juice
- ½ cup of granulated sugar
- 1 teaspoon of cinnamon
- ¼ teaspoon of nutmeg
- 2 tablespoons of all-purpose flour
- 1 cup of rolled oats
- 1 cup of all-purpose flour
- ½ cup of packed brown sugar
- ½ cup of cold unsalted butter, cut into cubes
- 1 teaspoon of vanilla extract
- ¼ teaspoon of salt
Instructions
- Preheat your oven to 350°F (175°C). Peel and slice the apples, tossing them with lemon juice, sugar, cinnamon, nutmeg, and 2 tablespoons of flour in a large mixing bowl.
- Transfer the apple mixture to a greased 9×13 inch baking dish, spreading it out evenly.
- In another bowl, mix rolled oats, 1 cup of flour, brown sugar, and salt. Add cold butter cubes and blend until coarse crumbs form. Stir in vanilla extract.
- Sprinkle the crumble topping generously over the apple filling.
- Bake for 40-45 minutes or until the apples are bubbling and the topping is golden brown.
- Allow to cool for about 10 minutes before serving.
Notes
Consider adding nuts or using a variety of apple types for enhanced flavor.
- Prep Time: 20 minutes
- Cook Time: 45 minutes
- Category: Dessert
- Method: Baking
- Cuisine: American
Nutrition
- Serving Size: 1 serving
- Calories: 400
- Sugar: 18g
- Sodium: 200mg
- Fat: 18g
- Saturated Fat: 7g
- Unsaturated Fat: 10g
- Trans Fat: 0g
- Carbohydrates: 60g
- Fiber: 4g
- Protein: 4g
- Cholesterol: 30mg
Ingredients
To create the ultimate apple crumble, you’ll need the following ingredients:
For the Filling:
- 6 cups of peeled and sliced apples (Granny Smith or Honeycrisp work best)
- 1 tablespoon of lemon juice
- ½ cup of granulated sugar (adjust based on the sweetness of your apples)
- 1 teaspoon of cinnamon
- ¼ teaspoon of nutmeg
- 2 tablespoons of all-purpose flour (to absorb juices)
For the Crumble Topping:
- 1 cup of rolled oats
- 1 cup of all-purpose flour
- ½ cup of packed brown sugar
- ½ cup of cold unsalted butter, cut into cubes
- 1 teaspoon of vanilla extract
- ¼ teaspoon of salt
You might want to consider some substitutions or optional additions like adding a sprinkle of chopped nuts for extra texture or using a mix of different apple varieties for a more complex flavor profile. Feel free to get creative!
Timing
When it comes to making apple crumble, timing is everything. Here’s how it breaks down:
- Prep Time: 20 minutes
- Cooking Time: 40-45 minutes
- Total Time: Approximately 1 hour
If you’re short on time, you can use pre-sliced apples from the store; just keep an eye on the sugar quantity, as processed apples are sometimes sweeter.
How to Make Apple Crumble
Step 1: Start by preheating your oven to 350°F (175°C), ensuring it’s hot enough to turn those apples into bubbling sweetness. While the oven warms up, peel and slice your apples, placing them in a large mixing bowl. Toss them with lemon juice, sugar, cinnamon, nutmeg, and the flour until evenly coated.
Step 2: Transfer the apple mixture to a greased 9×13 inch baking dish, spreading it out evenly. This helps ensure every bite is filled with that delightful apple flavor.
Step 3: In another bowl, mix rolled oats, flour, brown sugar, and salt. Add cold butter cubes to this mixture and use your fingers or a pastry cutter to blend until it resembles coarse crumbs. Stir in vanilla extract for that touch of warmth and flavor.
Step 4: Sprinkle the crumble topping generously over the apple filling, covering it well to create that gorgeous crunchy layer.
Step 5: Place the baking dish in your preheated oven and bake for 40-45 minutes. Keep an eye out—when the apples are bubbling and the topping is golden brown, it’s done!
Step 6: Allow your apple crumble to cool for about 10 minutes before serving. This gives it time to set, making it easier to scoop while still warm.
Healthier Alternatives
If you’re looking for healthier options or dietary accommodations, consider these alternatives:
- For a vegan version: Substitute unsalted butter with coconut oil or a plant-based butter alternative.
- For a gluten-free option: Use gluten-free flour for the crumble and make sure your oats are certified gluten-free.
- For lower sugar content: Try using a sugar substitute or natural sweeteners like maple syrup or honey, adjusting quantities to taste.
- Low-carb options: Replace regular flour with almond flour or a blended mix that caters to low carb diets.
Serving Suggestions
To elevate your apple crumble, consider these delicious serving ideas:
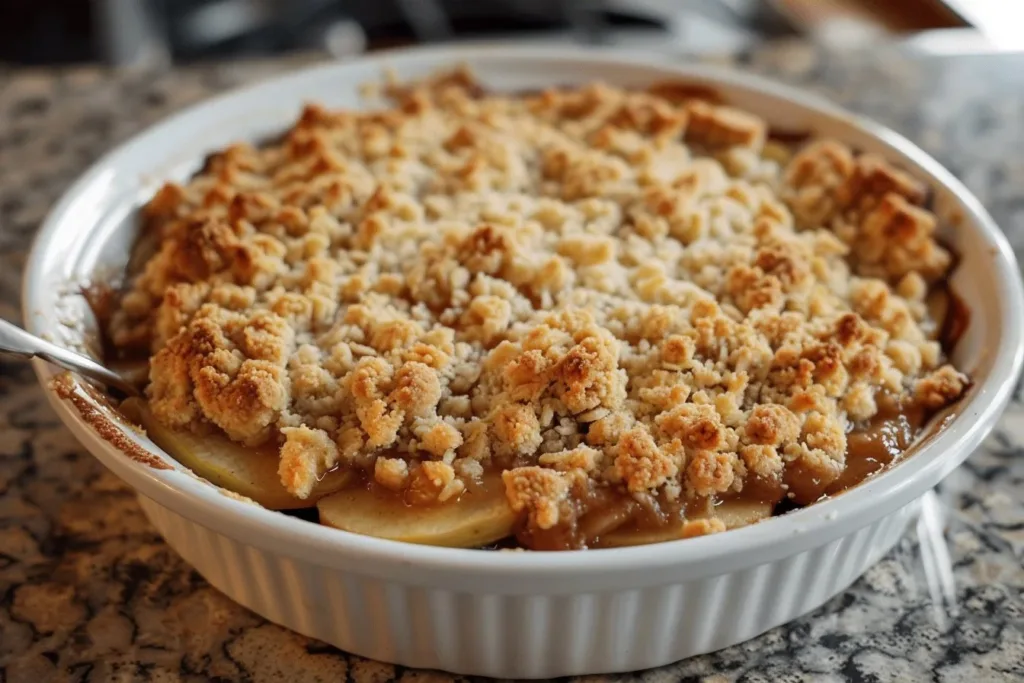
- Serve warm with a generous scoop of vanilla ice cream or dollops of whipped cream.
- Pair it with a drizzle of caramel sauce for an added layer of sweetness.
- Fresh mint leaves can add a refreshing touch when placed on top before serving.
- For beverages, a hot cup of cinnamon tea or even a fruity herbal iced tea complements the dish beautifully.
Common Mistakes to Avoid
Creating a perfect apple crumble is easier when you avoid these pitfalls:
- Not mixing the filling well: Ensure the apples are evenly coated with sugar and cinnamon to enhance flavor.
- Using mushy apples: While softer apples can work, a mix of firm and soft varieties yields the best texture.
- Not allowing it to cool: Cooling prevents the filling from being too runny, making for a prettier presentation.
- Overbaking or underbaking: Keep an eye on the crumble towards the end of baking. If it’s bubbling nicely but hasn’t browned, a few more minutes will help.
Storage Tips
To make the most of your apple crumble, follow these storage tips:
- Refrigerator: Store any leftovers in an airtight container for up to 3-4 days.
- Freezer: For longer storage, wrap it tightly in plastic wrap or aluminum foil, and it’ll stay fresh for up to 3 months. When ready to enjoy, thaw overnight in the fridge and bake to warm it up.
- Reheating: Simply pop portions in the oven at 350°F until warmed through, or microwave individual servings.
FAQs
Can I use frozen apples for apple crumble?
Yes, you can use frozen apples, but make sure to thaw and drain any excess liquid before preparing your filling.
How can I make my apple crumble extra crunchy?
To enhance that delightful crunch, you can add chopped nuts such as pecans or walnuts to your crumble topping.
What is the best type of apple for a crumble?
For the best flavor, mix tart apples like Granny Smith with sweeter varieties such as Fuji or Gala.
Can I prepare the crumble ahead of time?
Absolutely! You can prepare the apple filling and crumble topping in advance. Just refrigerate them separately and combine before baking.
Is apple crumble served hot or cold?
Apple crumble is best served warm, straight from the oven, but it can also be enjoyed cold if preferred.
Conclusion
Apple crumble is not just a dessert; it’s a warm hug in a dish. With its luscious apple filling and crunchy topping, it’s perfect for any occasion. Whether you fancy a cozy evening at home or want to impress your guests, this recipe won’t disappoint. So why not give it a try? Share your experience, and explore more recipes that bring warmth to your kitchen and joy to your gatherings.