Making Dark Chocolate Halloween Cookies is the perfect way to indulge your sweet tooth while celebrating the spookiest time of year. With rich chocolate flavors, a spooky twist, and the ability to impress family and friends, this recipe is sure to become a seasonal favorite. So, grab your mixing bowl, and let’s dive into this delicious adventure!
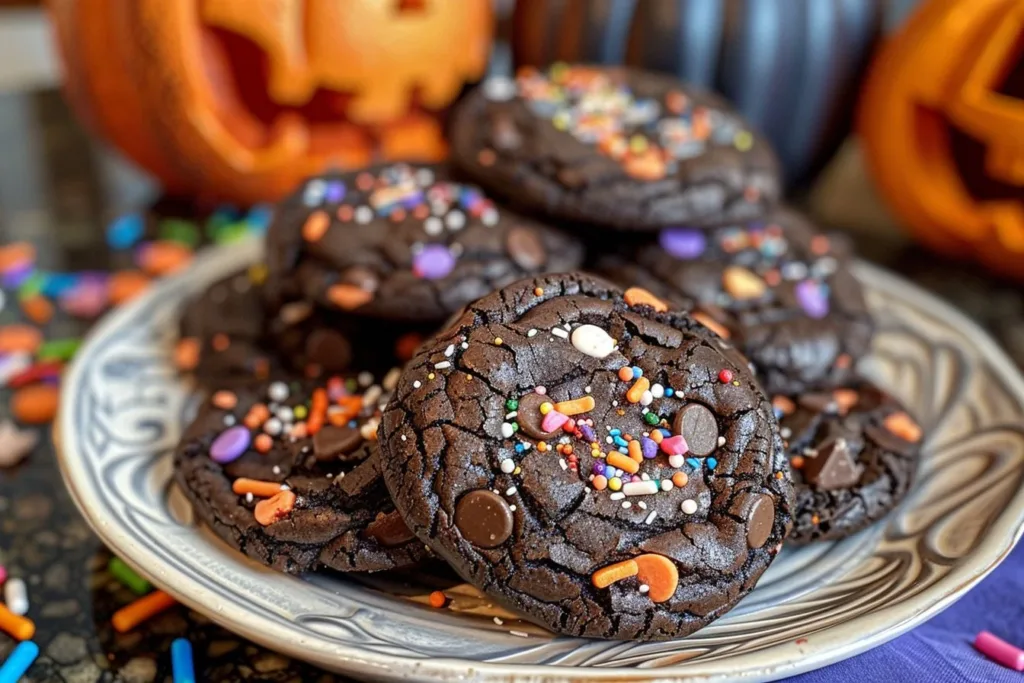
Ingredients
- 1 cup all-purpose flour
- 1/2 cup unsweetened cocoa powder
- 1/2 teaspoon baking soda
- 1/4 teaspoon salt
- 1/2 cup unsalted butter, softened
- 1/2 cup granulated sugar
- 1/2 cup packed brown sugar
- 1 teaspoon vanilla extract
- 1 large egg
- 1 cup dark chocolate chips
- 1/2 cup Halloween-themed sprinkles (optional)
- Optional: 1/2 cup chopped nuts (like walnuts or pecans)
For substitutions, you might consider:
- Using gluten-free flour for a gluten-free version.
- Coconut oil instead of butter for a dairy-free option.
- Maple syrup in place of granulated sugar for a more natural sweetener.
Timing
Prepping these cookies doesn’t take too long. Here’s the breakdown:
- Prep time: 15 minutes
- Cooking time: 10–12 minutes
- Total time: About 30 minutes
To save time, you can prepare the dough in advance and chill it in the refrigerator for up to 24 hours before baking.
How to Make Dark Chocolate Halloween Cookies
Step 1: Start by preheating your oven to 350°F (175°C). This ensures your cookies bake evenly. Line baking sheets with parchment paper for easy clean-up and to prevent sticking.
Step 2: In a medium bowl, whisk together the flour, cocoa powder, baking soda, and salt. This helps to evenly distribute the dry ingredients and ensures your cookies have a uniform texture.
Step 3: In a large mixing bowl, beat the softened butter, granulated sugar, and brown sugar together until the mixture is light and fluffy. This should take about 3–5 minutes of mixing. Adding air to the mixture is key to achieving a tender cookie.
Step 4: Mix in the vanilla extract and then add the egg, ensuring everything is well combined. The egg helps bind the cookies and gives them a moist texture.
Step 5: Gradually add the dry ingredients to the wet mixture. Stir until no flour streaks remain, but take care not to overmix. Overworking the dough can result in tough cookies.
Step 6: Fold in the dark chocolate chips and, if you’re using them, the Halloween-themed sprinkles and nuts. The chocolate chips will melt into gooey pockets of chocolate while baking, adding an indulgent touch.
Step 7: Using a tablespoon, scoop out equal portions of the dough and place them onto the prepared baking sheets, ensuring to leave space between each cookie, as they will spread while baking.
Step 8: Bake in the preheated oven for 10–12 minutes. You’ll know they’re done when the edges look set and the centers appear slightly underbaked. This will result in a chewy texture.
Step 9: Let the cookies cool on the baking sheet for about 5 minutes before transferring them to wire racks to cool completely. This step is essential for holding the shape and texture of the cookies.
Healthier Alternatives
Want to make your cookies a bit healthier? Consider these alternatives:
- Swap out regular sugar for coconut sugar or a sugar substitute like stevia for a lower-calorie option.
- For a vegan version, use flax eggs instead of a regular egg (1 tablespoon ground flaxseed mixed with 2.5 tablespoons water = 1 egg).
- If you’re looking for a nut-free cookie, simply omit the nuts or replace them with seeds like sunflower or pumpkin seeds.
Serving Suggestions
For a fun and festive presentation, stack your cookies in a clear jar tied with a colorful ribbon and use them as Halloween party favors. Serve these cookies on a spooky-themed platter with fake spider webs for a touch of Halloween flair. Pair them with a glass of cold iced milk, an apple cider drink, or even a hot cup of cocoa for an ultimate treat experience.
Common Mistakes to Avoid
To ensure your Dark Chocolate Halloween Cookies turn out perfectly, watch out for these common pitfalls:
- Avoid using cold butter; it should be at room temperature for better creaminess. Cold butter results in a less uniform cookie.
- Don’t skip the cooling time on the baking sheet. This allows the cookies to set, preventing them from crumbling when moved.
- Ensure you measure your ingredients accurately; too much flour can make your cookies dry.
- Don’t overbake. It’s better to take them out while they’re slightly underdone as they will continue baking on the tray, ensuring a chewy center.
Storage Tips
Storing your cookies properly can extend their freshness and flavor. Here are some helpful tips:
- Once cooled, store cookies in an airtight container at room temperature for up to a week.
- For longer storage, freeze baked cookies for up to three months. Just ensure they’re in a freezer-safe bag or container to prevent freezer burn.
- When you’re ready to enjoy, thaw them at room temperature or pop them in the microwave for a few seconds to revive that just-baked feel.
FAQs About Dark Chocolate Halloween Cookies
Can I use milk chocolate instead of dark chocolate?
Yes, absolutely! While the recipe focuses on dark chocolate, you can use milk chocolate or even a mix of both. Just remember, milk chocolate will make the cookies a little sweeter.
How can I make these cookies more festive?
You can add various decorations, such as eyeball candies or edible glitter, on top right after they come out of the oven for a Halloween vibe.
Can I double the recipe?
Absolutely! If you’re planning a Halloween party or a bake sale, just double the ingredient quantities. Ensure you have enough baking sheets and oven space.
How do I make these cookies without eggs?
You can replace the egg with a flax egg or applesauce. For one egg, mix 1 tablespoon of ground flaxseed with 2.5 tablespoons of water or use 1/4 cup of unsweetened applesauce as a substitute.
What should I do if the dough feels too dry?
If your cookie dough seems dry, try adding a tablespoon of milk or water at a time until you reach the desired consistency. This will help bind the ingredients without altering the flavor significantly.
Print
Dark Chocolate Halloween Cookies
- Total Time: 30 minutes
- Yield: 24 cookies 1x
Description
Indulge in rich chocolate flavors with these spooky Dark Chocolate Halloween Cookies, perfect for the Halloween season.
Ingredients
- 1 cup all-purpose flour
- 1/2 cup unsweetened cocoa powder
- 1/2 teaspoon baking soda
- 1/4 teaspoon salt
- 1/2 cup unsalted butter, softened
- 1/2 cup granulated sugar
- 1/2 cup packed brown sugar
- 1 teaspoon vanilla extract
- 1 large egg
- 1 cup dark chocolate chips
- 1/2 cup Halloween-themed sprinkles (optional)
- 1/2 cup chopped nuts (optional)
Instructions
- Preheat your oven to 350°F (175°C) and line baking sheets with parchment paper.
- Whisk together the flour, cocoa powder, baking soda, and salt in a medium bowl.
- Beat the butter, granulated sugar, and brown sugar together until light and fluffy.
- Mix in the vanilla extract, then add the egg, combining well.
- Gradually add the dry ingredients to the wet mixture, stirring until no flour streaks remain.
- Fold in the dark chocolate chips, sprinkles, and nuts if using.
- Scoop tablespoon-sized portions of dough onto the prepared baking sheets, leaving space in between.
- Bake for 10-12 minutes, until edges are set and centers are slightly underbaked.
- Cool on the baking sheet for 5 minutes before transferring to wire racks.
Notes
For healthier alternatives, consider using coconut sugar, flax eggs, or gluten-free flour as substitutes.
- Prep Time: 15 minutes
- Cook Time: 12 minutes
- Category: Dessert
- Method: Baking
- Cuisine: American
Nutrition
- Serving Size: 1 cookie
- Calories: 180
- Sugar: 10g
- Sodium: 90mg
- Fat: 8g
- Saturated Fat: 5g
- Unsaturated Fat: 2g
- Trans Fat: 0g
- Carbohydrates: 24g
- Fiber: 2g
- Protein: 2g
- Cholesterol: 30mg
Conclusion
Dark Chocolate Halloween Cookies are not just delicious; they’re also a perfect way to celebrate the joys of the season. With rich chocolate flavor, customizable ingredients, and a delightful appeal, they’ll steal the spotlight at any gathering. Try your hand at this recipe during Halloween or any chocolate-loving occasion, and don’t forget to share your experience or explore more delicious recipes on our blog!