With summer in full swing, have you ever found yourself with an abundance of cherry tomatoes and a craving for something unique? Look no further! This delicious cherry tomato pie combines the sweet burst of juicy tomatoes with a flaky crust, creating a mouthwatering dish your friends and family will love. It’s a wonderful way to showcase fresh produce, and it’s surprisingly simple to make.
Print
Cherry Tomato Pie
- Total Time: 55 minutes
- Yield: 4 servings 1x
Description
A delicious cherry tomato pie combines sweet cherry tomatoes with a flaky crust, perfect for showcasing fresh produce.
Ingredients
- 1 pre-made or homemade pie crust (9 inches)
- 2 cups cherry tomatoes, halved
- 1 cup shredded mozzarella cheese
- 1/2 cup grated Parmesan cheese
- 1/2 cup fresh basil, chopped
- 2 large eggs
- 1 cup heavy cream
- 1 tablespoon olive oil
- 1 teaspoon garlic powder
- Salt and pepper to taste
- 1/4 teaspoon crushed red pepper flakes (optional)
- 1/2 teaspoon dried oregano (optional)
- Additional herbs like thyme or rosemary for garnish (optional)
Instructions
- Preheat your oven to 375°F (190°C).
- Place your pie crust into a pie dish, pressing it gently into the corners.
- In a large mixing bowl, combine the halved cherry tomatoes, mozzarella cheese, Parmesan cheese, basil, garlic powder, and salt and pepper.
- In another bowl, whisk together the eggs and heavy cream. Pour this mixture over the tomato and cheese filling.
- Drizzle with olive oil to enhance flavor.
- Bake the pie in the preheated oven for 30-40 minutes.
- Allow the pie to cool for about 10 minutes before slicing.
Notes
Consider using a gluten-free crust or dairy alternatives to cater to different dietary needs. Serve with a side salad or sparkling grape juice.
- Prep Time: 15 minutes
- Cook Time: 40 minutes
- Category: Main Course
- Method: Baking
- Cuisine: Italian
Nutrition
- Serving Size: 1 serving
- Calories: 350
- Sugar: 5g
- Sodium: 400mg
- Fat: 12g
- Saturated Fat: 4g
- Unsaturated Fat: 6g
- Trans Fat: 0g
- Carbohydrates: 45g
- Fiber: 3g
- Protein: 15g
- Cholesterol: 30mg
Ingredients
To create this vibrant dish, gather the following ingredients:
- Pie Crust:
- 1 pre-made or homemade pie crust (9 inches)
- Filling:
- 2 cups cherry tomatoes, halved
- 1 cup shredded mozzarella cheese
- 1/2 cup grated Parmesan cheese
- 1/2 cup fresh basil, chopped
- 2 large eggs
- 1 cup heavy cream
- 1 tablespoon olive oil
- 1 teaspoon garlic powder
- Salt and pepper to taste
- Optional Ingredients:
- 1/4 teaspoon crushed red pepper flakes for added heat
- 1/2 teaspoon dried oregano for extra flavor
- Additional herbs like thyme or rosemary for garnish
If you need substitutions, consider using a gluten-free crust or dairy alternatives like almond milk and vegan cheese to cater to different dietary needs.
Timing
Preparation time for this delightful dish is approximately 15 minutes. Give it about 30 to 40 minutes to cook in the oven, depending on your pie crust. In total, you’re looking at around 55 minutes from start to finish. That’s quick enough to whip it up for a last-minute gathering!
How to Make Cherry Tomato Pie
Step 1: Preheat your oven to 375°F (190°C). A well-preheated oven helps ensure that your crust gets golden and crispy.
Step 2: Place your pie crust into a pie dish, pressing it gently into the corners. If you’re using a store-bought crust, just unroll it and fit it into the dish. Prick the bottom with a fork several times to prevent bubbling.
Step 3: In a large mixing bowl, combine the halved cherry tomatoes, mozzarella cheese, Parmesan cheese, basil, garlic powder, and your salt and pepper. Toss everything together until well mixed. The tomatoes should shine with the flavors of the cheese and herbs.
Step 4: In another bowl, whisk together the eggs and heavy cream. This mixture acts as a custard that binds everything together. Pour this mixture over the tomato and cheese filling, ensuring that every part of the filling is well-coated.
Step 5: Drizzle with olive oil to enhance flavor, making sure it’s evenly distributed. This gives the pie a lovely richness and a hint of Mediterranean flair.
Step 6: Bake the pie in the preheated oven for 30-40 minutes or until the top is set and lightly browned. You want the filling to be bubbling and the crust looking golden, which makes for a perfect picture!
Step 7: Once out of the oven, allow the pie to cool for about 10 minutes before slicing. This resting period lets the filling set, making it easier to serve without spilling.
Healthier Alternatives
If you’re looking for ways to cater to dietary preferences, consider these alternatives:
- Crust: Use a gluten-free crust or whole wheat crust for a healthier option.
- Cream: Substitute the heavy cream for coconut milk or almond milk to reduce calories.
- Cheese: Go with low-fat cheese options to lower the fat content, or use nutritional yeast for a vegan alternative.
- Eggs: You can replace the eggs with a flaxseed mixture (1 tablespoon of flaxseed meal + 2.5 tablespoons of water = 1 egg) for a healthier, plant-based option.
Serving Suggestions
This pie is delightful on its own, but you can elevate your dining experience with a few creative ideas:
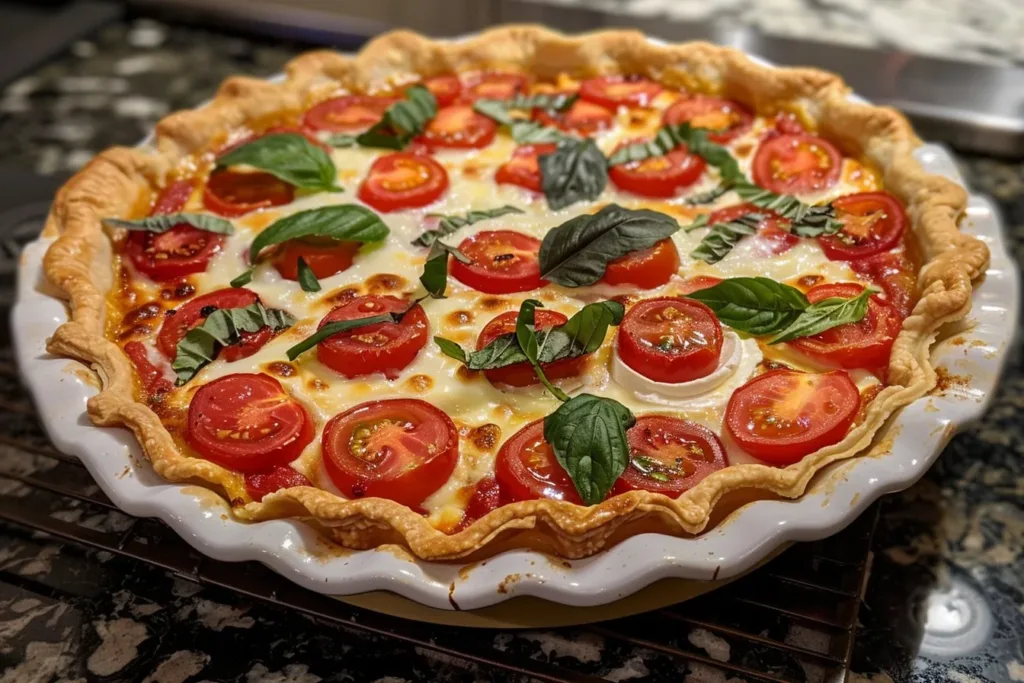
- Serve alongside a crisp arugula salad with a light vinaigrette for a refreshing balance.
- Pair with a glass of sparkling grape juice for a festive touch.
- For added flavor, sprinkle some extra fresh basil or a drizzle of balsamic reduction over the slice before serving.
Common Mistakes to Avoid
Even seasoned cooks can make some common missteps when preparing this dish. Here are a few pitfalls and how to avoid them:
- Soggy Crust: Always prick the base of your pie crust with a fork to avoid bubbling. You can also pre-bake the crust for 10-15 minutes before adding the filling to ensure a crispier base.
- Overcooking: Keep an eye on the oven! If the top gets browned too quickly but the center isn’t set, consider covering it with foil to prevent burning.
- Insufficient Seasoning: Don’t skimp on the seasoning. Tomatoes bring a natural sweetness that balances well with a bold flavor, so season generously!
Storage Tips
To properly store your delicious pie, consider these tips:
- Refrigerator: Store any leftovers in an airtight container in the refrigerator for up to 3 days. Reheat in a warm oven for the best results, keeping it juicy and flavorful.
- Freezer: If you want to make this dish ahead of time, you can freeze the pie before baking. Wrap it tightly in plastic wrap and aluminum foil for up to 2 months. Bake from frozen, adding about 10-15 minutes to the cooking time.
- Meal Prep: This pie makes a great option for meal prep! Simply slice it into portions and store. Reheat individual servings for a quick, delicious meal.
Frequently Asked Questions
How do I prevent the filling from being runny?
Make sure to drain excess liquid from the halved tomatoes before combining them with other ingredients. If you’re concerned about moisture, you can also sprinkle a little cornstarch over the tomatoes to absorb any extra liquid.
Can I use other types of tomatoes?
Absolutely! While cherry tomatoes work wonderfully, you can substitute them with grape tomatoes or even diced regular tomatoes. Just ensure that you drain excess moisture.
What herbs pair well with cherry tomato pie?
Besides basil, you might enjoy adding oregano, thyme, or even a sprinkle of rosemary for a different flavor profile. Feel free to mix and match based on your personal preference!
Can I make this pie ahead of time?
Yes! You can prepare the pie ahead of time and refrigerate it before baking. Just remember to account for extra baking time if it’s chilled.
How do I know when the pie is done?
The pie is ready when the top is golden and bubbly, and a knife inserted into the center comes out clean. Give it a few gentle shakes; the filling should be set without too much jiggle.
Conclusion
Cherry tomato pie perfectly blends fresh ingredients and delightful flavors, making it an inviting addition to any meal. Versatile and easy to prepare, this dish is not only delicious but also a great way to use up those extra cherry tomatoes from your garden or farmers’ market. So, roll up your sleeves and give this a whirl—your taste buds will thank you! Don’t forget to share your experiences and any personal twists you’ve added!