Apple pie is practically an American institution, and when you throw apple cider into the mix, you elevate it to a whole new level. Have you ever considered how a fusion of sweet cider and cinnamon-spiced apples can create a dish that warms the heart and delights the senses? Apple cider pie is more than just dessert; it’s a slice of nostalgia, a bite of warmth that transports you back to cozy autumn gatherings, apple-picking ventures, and cheerful holiday feasts. Let’s take a deliciously deep dive into the world of apple cider pie!
Print
Apple Cider Pie
- Total Time: 80 minutes
- Yield: 8 servings 1x
Description
A delicious blend of sweet cider and cinnamon-spiced apples, creating a warm and nostalgic dessert.
Ingredients
- For the crust:
- 2½ cups all-purpose flour
- ½ cup unsalted butter, chilled and cut into cubes
- 1 teaspoon salt
- 1 tablespoon sugar
- 6–8 tablespoons ice water
- For the filling:
- 6 cups apples, peeled, cored, and sliced (Granny Smith and Honeycrisp)
- 1½ cups apple cider
- ¾ cup sugar
- 1 tablespoon all-purpose flour
- 2 teaspoons cinnamon
- ½ teaspoon nutmeg
- 1 tablespoon lemon juice
- 1 teaspoon vanilla extract
- Optional toppings:
- Whipped cream
- Vanilla ice cream
- Caramel sauce
Instructions
- Begin by preparing your pie crust. In a large bowl, combine the flour, sugar, and salt. Cut in the cold butter until the mixture resembles coarse crumbs. Gradually add ice water, one tablespoon at a time, mixing until the dough comes together. Shape this dough into a disc, wrap it in plastic, and refrigerate for at least 30 minutes.
- While the crust is chilling, prepare the filling. In a large bowl, toss the sliced apples with lemon juice, sugar, cinnamon, nutmeg, and flour. Stir well to ensure all the apples are coated.
- Preheat your oven to 425°F (220°C). Once your dough is ready, roll it out on a floured surface to fit a 9-inch pie pan. Place the bottom crust in the pan and add the apple mixture.
- Pour the apple cider over the apples, ensuring it’s evenly distributed.
- Roll out the second portion of dough and place it over the filling. Crimp the edges to seal and cut a few vents in the top crust to let steam escape.
- Bake the pie in the preheated oven for 15 minutes. Then reduce the temperature to 350°F (175°C) and continue baking for another 30-35 minutes, until the apples are tender and the crust is golden brown.
Notes
Serve warm with whipped cream or vanilla ice cream for a perfect dessert experience.
- Prep Time: 30 minutes
- Cook Time: 50 minutes
- Category: Dessert
- Method: Baking
- Cuisine: American
Nutrition
- Serving Size: 1 slice
- Calories: 350
- Sugar: 14g
- Sodium: 200mg
- Fat: 15g
- Saturated Fat: 8g
- Unsaturated Fat: 7g
- Trans Fat: 0g
- Carbohydrates: 50g
- Fiber: 3g
- Protein: 2g
- Cholesterol: 30mg
Ingredients
Creating the perfect apple cider pie begins with gathering the finest ingredients. Here’s what you’ll need for a mouth-watering experience:
For the crust:
- 2 ½ cups all-purpose flour
- ½ cup unsalted butter, chilled and cut into cubes
- 1 teaspoon salt
- 1 tablespoon sugar
- 6-8 tablespoons ice water
For the filling:
- 6 cups apples, peeled, cored, and sliced (Granny Smith and Honeycrisp work wonderfully)
- 1 ½ cups apple cider (not overly sweet)
- ¾ cup sugar (feel free to adjust to taste)
- 1 tablespoon all-purpose flour
- 2 teaspoons cinnamon
- ½ teaspoon nutmeg
- 1 tablespoon lemon juice
- 1 teaspoon vanilla extract
Optional toppings:
- Whipped cream
- Vanilla ice cream
- Caramel sauce
If you’re looking to make some substitutions, you can opt for a gluten-free flour blend for the crust or use a dairy-free butter alternative. If apples aren’t your favorite, you might experiment with pears for a delightful twist!
Timing
Before diving into the steps, let’s talk about timing. You’ll spend approximately 30 minutes preparing the crust and the filling, and it will take an additional 45-50 minutes to bake your pie. This means you’ll have a total time investment of about 1 hour and 20 minutes. It’s well worth the wait, especially when the aroma fills your kitchen!
How to Make Apple Cider Pie
Making apple cider pie doesn’t have to be intimidating. With clear steps and a few handy tips, you’ll have a delicious masterpiece in no time.
Step 1: Begin by preparing your pie crust. In a large bowl, combine the flour, sugar, and salt. Cut in the cold butter until the mixture resembles coarse crumbs. Next, gradually add ice water, one tablespoon at a time, mixing until the dough comes together. Shape this dough into a disc, wrap it in plastic, and refrigerate for at least 30 minutes. This resting period allows the gluten to relax, making it easier to roll out later.
Step 2: While the crust is chilling, prepare the filling. In a large bowl, toss the sliced apples with lemon juice, sugar, cinnamon, nutmeg, and flour. Stir well to ensure all the apples are coated. This not only flavors the apples but also helps thicken the filling during baking.
Step 3: Preheat your oven to 425°F (220°C). Once your dough is ready, roll it out on a floured surface to fit a 9-inch pie pan. Place the bottom crust in the pan and add the apple mixture, mounding the apples slightly in the center.
Step 4: Pour the apple cider over the apples, ensuring it’s evenly distributed. This will infuse the pie with rich apple flavor as it bakes.
Step 5: Roll out the second portion of dough and place it over the filling. Crimp the edges to seal. Cut a few vents in the top crust to let steam escape. This step is crucial, as it will prevent the crust from becoming soggy.
Step 6: Bake the pie in the preheated oven for 15 minutes. Then, reduce the temperature to 350°F (175°C) and continue baking for another 30-35 minutes, or until the apples are tender and the crust is golden brown. Keep an eye on it—if the edges are browning too quickly, cover them with strips of aluminum foil.
Healthier Alternatives
If you’re looking to lighten up this classic dessert, there are several options available. Try a whole grain or almond flour crust, which adds fiber and nutrients. For a vegan version, substitute the butter with coconut oil or a dairy-free margarine and use a flax egg mixture instead of traditional eggs if required. Sweeteners such as maple syrup or stevia can replace some of the sugar, cutting down on refined sugars. These modifications can make your apple cider pie a more guilt-free indulgence!
Serving Suggestions
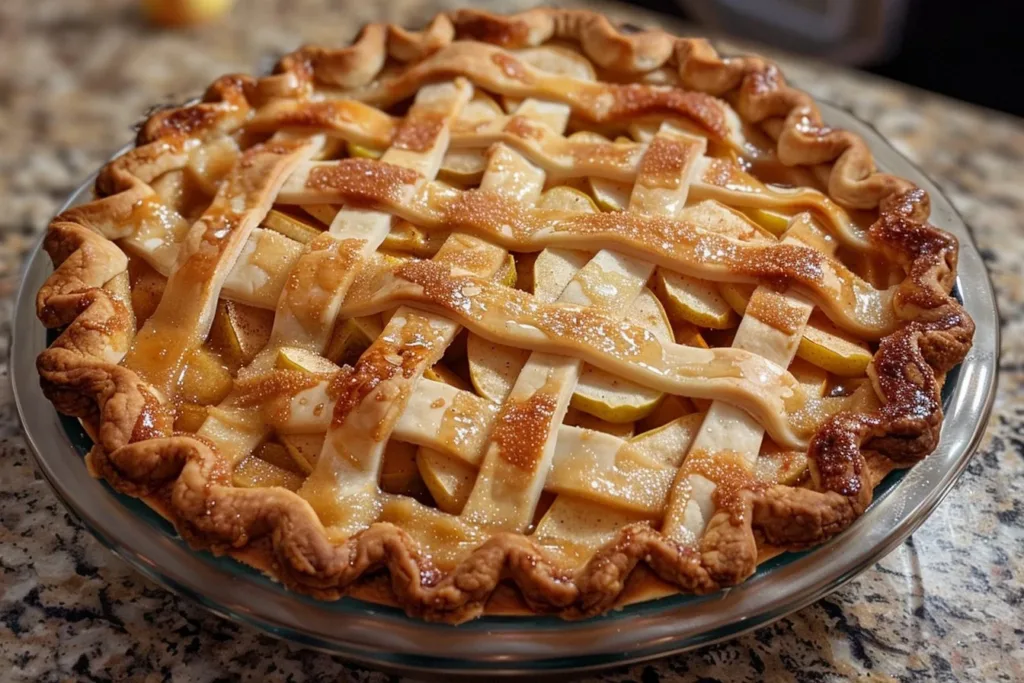
A well-crafted apple cider pie deserves a showcase! Serve it warm, topped with a generous dollop of whipped cream or a scoop of vanilla ice cream; the creaminess perfectly balances the pie’s flavors. Pair it with a steaming mug of spiced apple cider or a cup of herbal tea for a cozy experience. For an added touch, drizzle some caramel sauce over the pie – it adds a lovely sweetness and a visual appeal that’s hard to resist.
Common Mistakes to Avoid
To achieve pie perfection, it’s important to avoid some common pitfalls.
- Neglecting to chill the pie crust can result in a tough and chewy texture. Always give your dough enough time to chill.
- Skipping the flour in the filling can lead to a soupy pie. The flour helps absorb excess moisture from the apples during baking.
- Overcooking or undercooking your pie can result in either a burnt crust or crunchy apples. Keep an eye on the baking time and adjust as needed.
- Forgetting to cut vents in the crust traps steam, leading to a soggy filling. Make sure to cut at least three small slits in any top crust.
Storage Tips
If you happen to have any leftover pie (though that’s a rare occurrence!), store it in the refrigerator for up to 3–5 days. To keep the crust fresh, cover it with plastic wrap or aluminum foil. If you want to save it for a longer period, freezing is an option! Wrap the cooled pie tightly in plastic wrap and then foil, ensuring it is airtight. It can be stored in the freezer for up to 3 months. When you’re ready to enjoy, reheat it in the oven at 350°F (175°C) for about 20 minutes, and it will taste almost as good as fresh!
FAQs
Can I use store-bought pie crust instead of homemade?
Absolutely! Store-bought pie crust can save you time and still taste delicious. Just be sure to follow the package instructions for baking.
What types of apples are best for apple cider pie?
A mix of Granny Smith and Honeycrisp apples works wonderfully. Granny Smith offers a nice tartness, while Honeycrisp adds sweetness and crunch.
Can I make this pie ahead of time?
Yes! You can prepare the pie and keep it in the refrigerator for a day before baking. Alternatively, you can also assemble it and freeze it raw before baking. Just ensure to bake it straight from the freezer, adding a bit more time to ensure it cooks through.
What’s the best way to reheat leftover apple cider pie?
The best way to reheat is in the oven at 350°F (175°C). Cover it with foil to prevent over-browning and heat for about 20 minutes.
Can I add nuts to the filling?
Certainly! Chopped walnuts or pecans can add a delightful crunch to your filling. Just toss them in with the apples for added texture.
Conclusion
Apple cider pie is not just a seasonal treat—it’s a celebration of flavors that brings the essence of autumn right to your table. From the delightful aroma that fills your kitchen to the warm, comforting flavors of spiced apples, it’s a dessert that creates memories and evokes a sense of joy. Don’t hesitate to explore this recipe and perhaps even customize it to suit your taste. I encourage you to try making it, share it with friends and family, and savor every bite.